Tutorial 1, Part 3b – Import ASCII file
Pick here to see an online movie of Tutorial 1 Part 3b
(If you manually entered all of the baseline/offset data in Part 3a, then please skip ahead to Part 3c)
Switch to your "Import/Export" ribbon and select "ASCII Import Points from a File" from the "Coordinate Files" group to read in a file containing point coordinates. The sample file included with IMS Map360 has 54 Points stored in it in a format of Point Number, Y, X, Z, Description with commas between each field. This is commonly referred to as a “comma delimited file”.
Defining your Format
When you start the command you will be shown this dialog. The file in this example requires you press the first button, Coordinates Delimited.

Match the format of the ASCII file, in this case it is Format= Pt#,Y,X,Z,Desc and Delimiter= Comma. The Store coordinates in COGO database option should also be checked on so that the points will be read in and displayed on the drawing screen as well as being added to the database file. Then click OK to continue.

Set your import Toggles as shown. This will ensure that the point data is all drawn into the diagram. You would not normally change any of the toggle settings in your scenes. To check on the current Automap file pick on the Set Up AutoMAP System button:
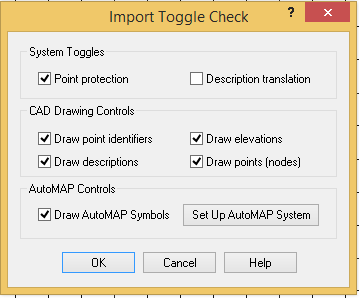
Setting the AutoMap
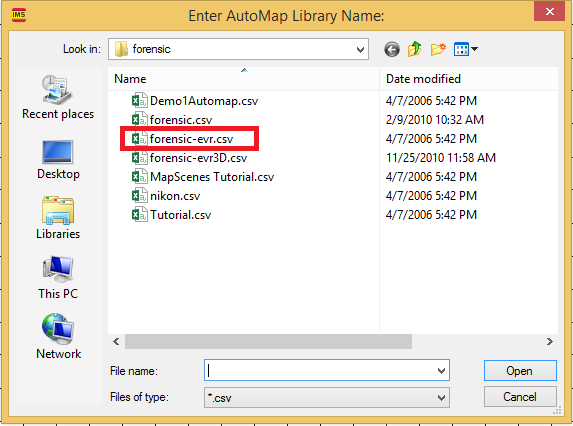
Forensic-EVR.csv is the default AutoMap library used by IMS Map360 and Evidence Recorder. Select it (or your desired library file) and click Open to load and use it.
Then click OK on the Import Toggle Check dialog to continue.
Selecting the ASCII File
Locate the ASCII file by using the Look In portion of the dialog to go to the correct folder – this example file is in:
C:\Users\(User name)\Documents\Leica Geosystems\IMS\Forensic Scenes\Tutorial.TXT
Select the Tutorial.TXT file then click Open to continue.

The file will be read into the drawing and the database.
The Final Result
Once it is read in, the drawing should look like this:
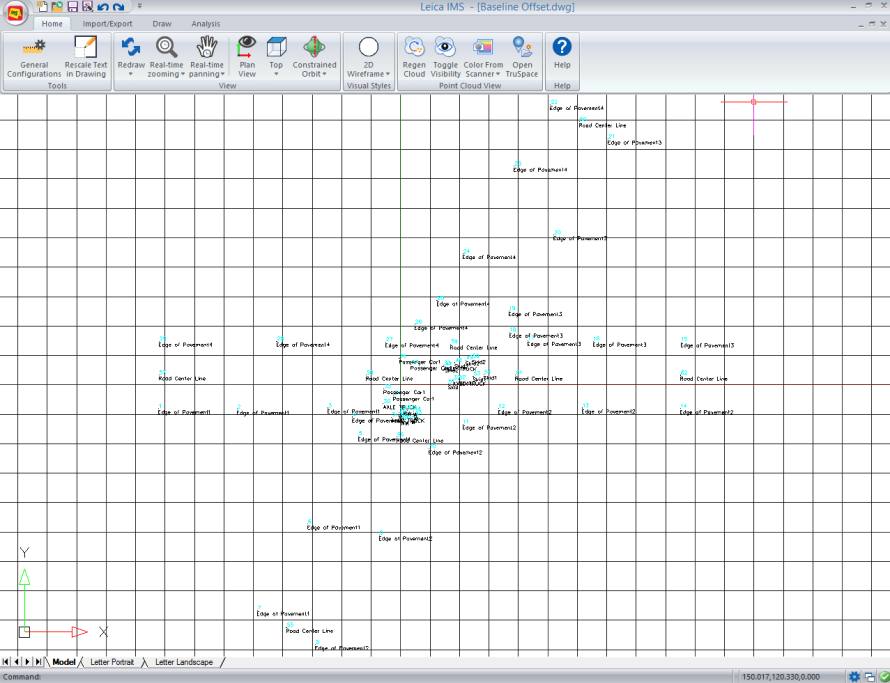
AutoMap has automatically placed the points on the correct layers based upon their descriptions. The simple descriptions have also been changed so they are more descriptive in the drawing. For example, EP1 was on the point in the database which came directly from the ASCII file. It was placed on the drawing as Edge of Pavement1.
Save
Pick the "Save" button to save your work: