Stake Points
Main Menu | Staking | Stake Point
Point Toolbar |
Step 1: Select Design Point
When you start the

Point ID
This allows you to manually enter in the point you would like to stake.
Point Desc
This shows the description of the current design point.
Previous & Next
Use this to automatically advance to the next or previous point in your database. Note that you need to have a value entered in the point number field.
If you have a
Nearest Search
This will automatically select the closet point to stake.
Use List
Use this to force the staking routine to use the
Edit Staking List
Use this to open the
Offset Direction & Distance
Use this to compute an offset from your design point. If you leave the distance field set to zero, an offset will not be computed. You can use angle and distance recall features to help you compute your values.
Northing, Easting, & Elevation
This will display the design coordinates for the point listed in the point number field. If you specify an offset, then the northing and easting will be recalculated based on the offset you entered. The elevation is of the point listed in the point id field, and is not affected by an offset.
Multi-Offset Mode
This feature has been recently added to FieldGenius and allows the user to compute and stake multiple offsets from a single point without having the Point ID automatically increment.
Stake Point button:
If you're using a non-robotic instrument, you will see the "turn to" screen displaying the angle and distance you need to measure to
If you're using
Step 2a: Non Robotic Total Station Layout
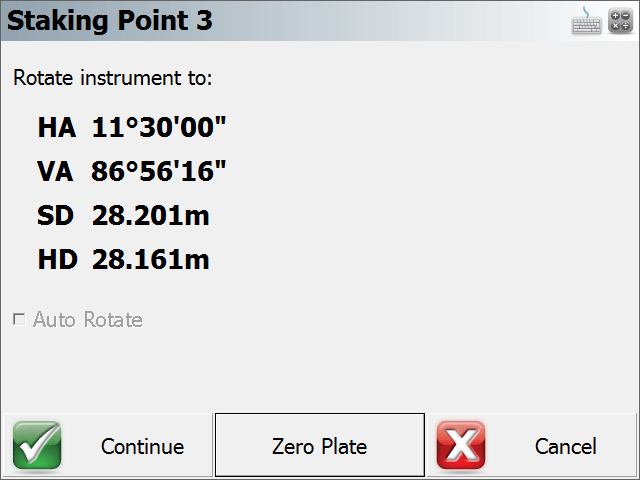
Rotate instrument to:
From this screen you will see what angle and distance you need to turn to on your instrument to
At this point you can turn your instrument to match the angles and when ready to start, press the Continue button. The Turn To information is also available on the next screen in case you need to see it again.
Note: Your target height is used to determine the vertical angle for the stake point.
Auto Rotate
If your instrument has servo motors and FieldGenius supports your instrument, this option will be available. It will be on by default and will automatically turn to match both the horizontal and vertical angles needed to
Zero Plate
This is used to modify plate reading on your instrument in such a way that if you manually turn to zero you will be facing towards the point you want to
When you do so, you will see a message "Zero the plate circle to the design point and update the backsight setup?" Press Yes to continue, or No to Cancel. After you press Yes, a new backsight reading is set on the instrument and a BK record is written to the raw file.
You will also note that the turn to angle will now display zero, which is the angle you now need to turn to on the instrument.
You can continue using this for any other points you want to
Continue
Press this button to continue. You will now see the map screen and the point
Step 2b: Robotic Total Station Layout
If you're using a robotic instrument and have the Robotic Staking option enabled, the layout routine will bypass the screen and steps explained in the Step 2a section. Instead, FieldGenius will take you directly to the map screen where you will see our point
By default, FieldGenius will have the robotic staking option enabled for all robotic total stations.
Some users may need their robotic instrument to automatically turn to the layout point instead. If this is desired, just disable robotic staking.
Step 2c: GNSS Rover Layout
When connected to a GNSS rover, the layout routine will bypass the screen and steps explained in Step 2a. Instead, FieldGenius will take you directly to the map screen where you will see our point