Sideshot
Main Menu or Instrument Toolbar | Measure Modes | Sideshot
If you like reviewing your shots prior to being stored in the database and raw file, then this is the mode you should use. When you press the measure button on the instrument toolbar, after the shot is measured you will see the store point screen prior to storing the point.
When you set this mode you will see the word
When you complete the measurement using the measure button you will see the Store/Edit Point screen.
You can also confirm or change the Target Height used for this shot.
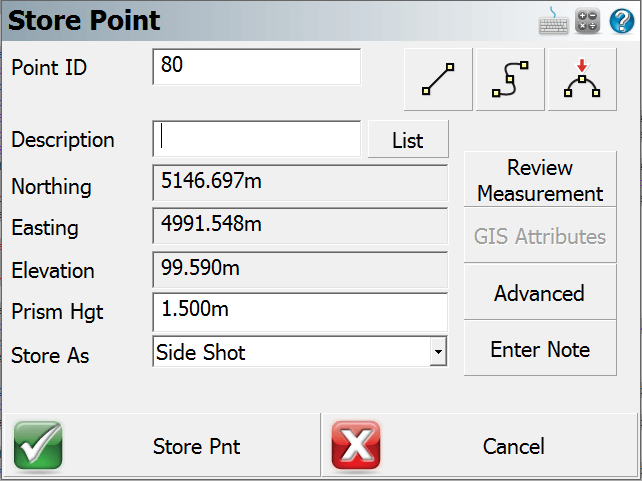
After reviewing the information you have three options to choose from:
Store As Side Shot
The default selection, will store the coordinate in the database and create a sideshot record (SS) in the raw file.
SS,OP350,FP3,AR0.00000,ZE94.50090,SD13.2700,--<No Desc>
Store As Traverse Shot
Select this option to store the coordinate in the database and create a traverse record (TR) in the raw file.
TR,OP350,FP4,AR0.00000,ZE94.50080,SD13.2700,--<No Desc>
Traverse records are needed if you want to compute a traverse closure. If your last shot from a setup is recorded as a traverse record, when you use the occupy point routine it will automatically advance you. This is commonly referred to as "leap frogging" your traverse.
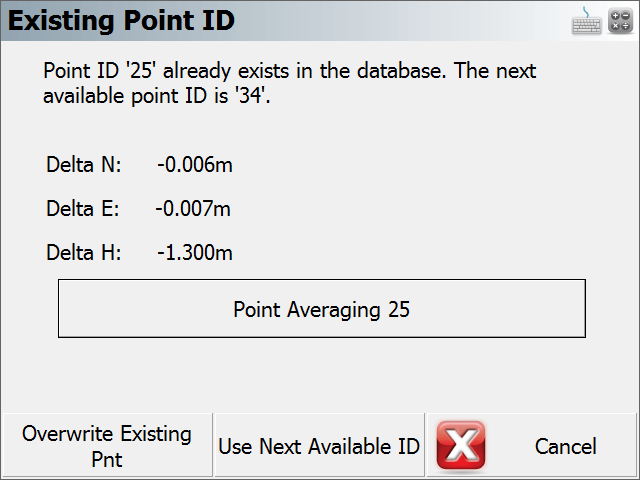
Store As Averaged Point
Select this option to use the observation for Point Averaging. If you set the Point ID to a value of an existing point and store as Side Shot or Traverse Shot, the option to enter Point Averaging will be presented.
Store Pnt
Press this to store the point in the coordinate database and update the raw file.
Cancel
Press this to cancel the shot and not store anything.
Note: For more information on the other buttons found on this screen please read the Store / Edit Points topic.