Alignment Offset Staking
Continued from Alignment Staking...
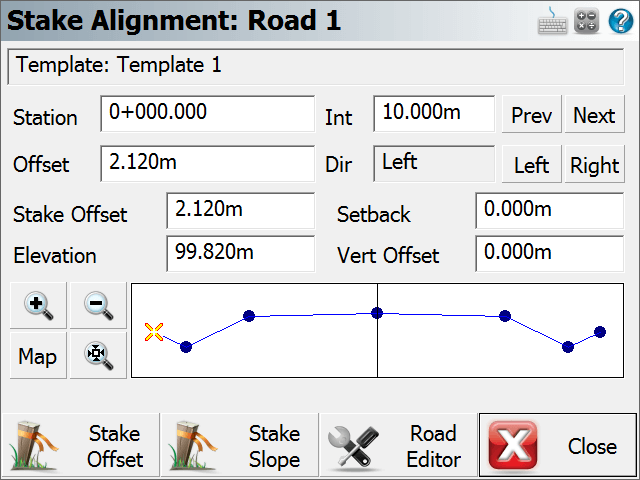
From the stake alignment screen, when you press the Stake Offset button if you are staking with a robotic instrument
The alignment offset staking process is very similar to normal point staking. What is different is you will see the station/offset information about where the prism is in relation to the alignment and more importantly, to the point you're staking.
Staking Method
Turn an Angle: You will see the horizontal angles to the design point and to your actual measurement. This is useful for getting online (left/right) with a conventional total station.
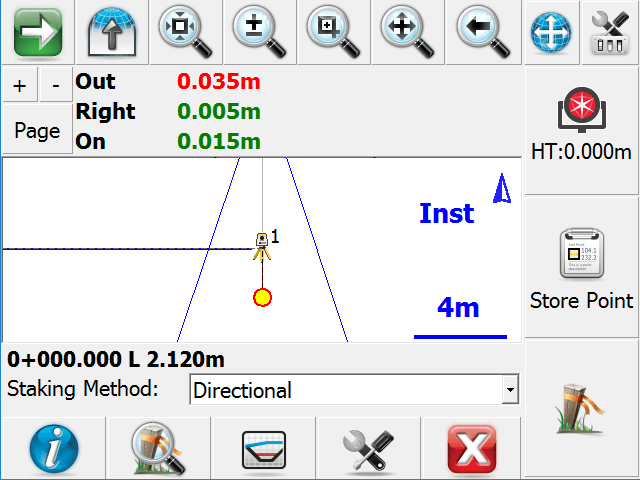
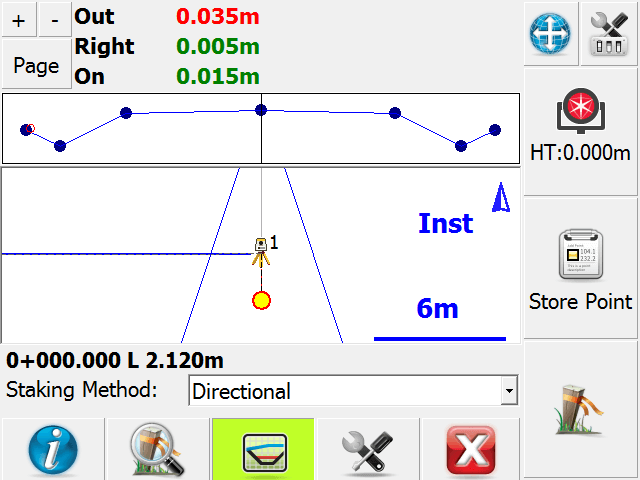
Directional: You will see the move distances (In/Out/Left/Right or N/S/E/W, as well as Cut/Fill) guiding you from the actual measurement to the design point.
Radial: You will see a direction and distance guiding you from the actual measurement to the design point.
Stationing - Absolute: You will see the offset of the actual measurement along the alignment.
Stationing - Relative: You will see the move distances guiding you along the alignment from the actual measurement to the design point.
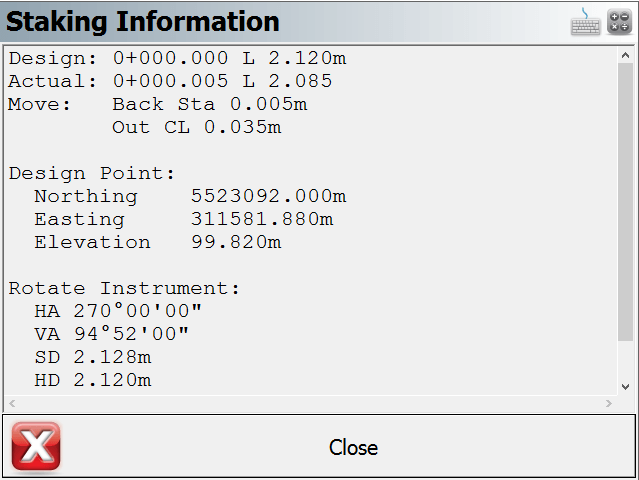
Staking Information
The station/offset of the design point is indicated directly on the staking toolbar, and also in the Staking Information screen which you can access by pressing the Info button in the staking toolbar.
The station/offset of the actual measurement is available in the Staking Information screen.
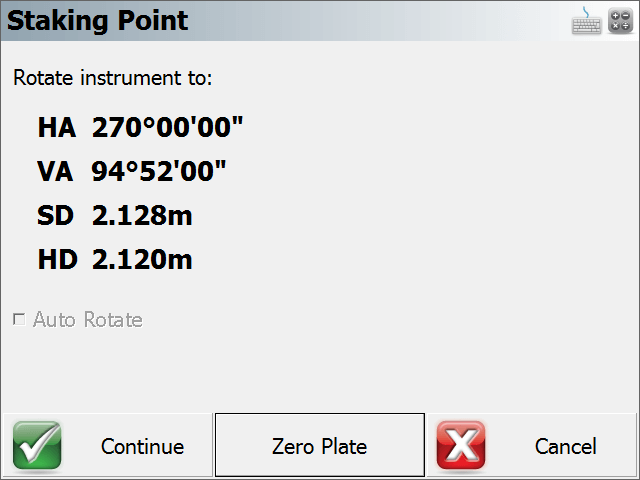
The move or rotate information which will guide you from the actual measurement to the design point is indicated in the observation toolbar. You can press the Page button to toggle between various information if you do not see these values. If your measurement is within your defined tolerance of the design point then the text will be green, if not then the text will be red. This information is also available in the Staking Information screen. The type of information shown will vary based on your current Staking Method.
Template Preview
|
|
At any time during your staking you can press the Profile button to see the actual rod position which will be shows as an orange circle, in relation to the template defined for the alignment. |
Zoom Stake
If you press the Zoom Stake button in the staking toolbar, you will be zoomed in to show you both the design point and the actual measurement. The green circular area surrounding the design point reflects the area where you are within the defined staking tolerances.

Store Point
When you are ready to store the stake point press the Store Point button. You will then see the results for your stakeout.
If you are using GNSS to stake the alignment, then you will not see the Store Point button. Instead, press the Measure button to trigger a measurement and then store the resulting shot.
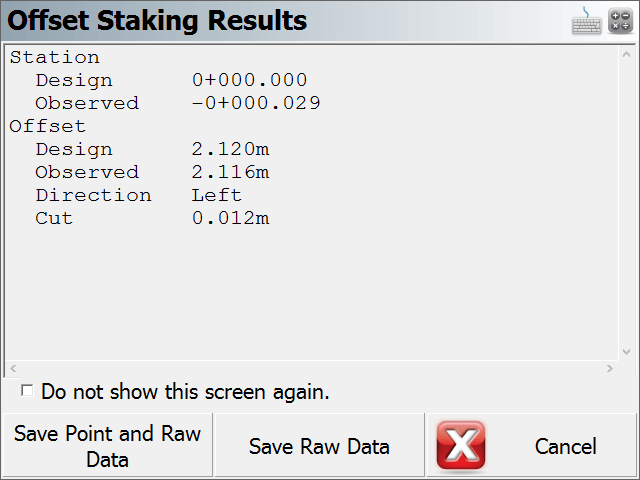
Press Save Point and Raw Data to store a point for this shot and to write your stake and cut sheet records to the raw file. By default the description for the stored stake point will equal the station and offset that was being staked.
Press Save Raw Data to write your stake and cut sheet records to the raw file, without storing a point.
If you press Cancel, nothing is stored or written to the raw file.
Records written to raw file
Following are the records that are written to the raw file when you store a point.
If you do not store a point then the SP (Store Point) record is not recorded as no point was stored in the database.
SP,PN4,N 20000.0068,E 5000.0099,EL100.1038,--0+00.00 C 0.000
CF,ST0.000,OD1,OL0.010,EL100.1038,GD100.0000
OE,ST0.000,OE0.010
DE,PN,N 20000.000,E 5000.000,EL100.000,--
SD,ND-0.007,ED-0.010,LD-0.104
SK,OP1,FP4,AR201.48000,ZE93.10000,SD269.6600,--0+00.00 C 0.000