Alignment Slope Staking
Continued from Alignment Staking...
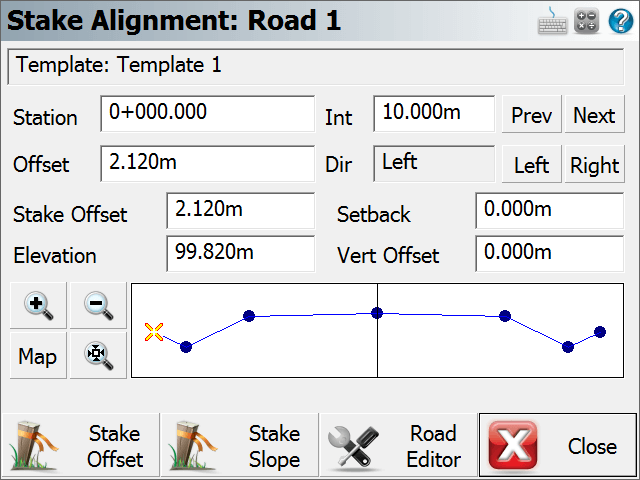
When you're staking a point from a template, you can select the Stake Slope button from any point. However, you will usually slope stake from the hinge points on your template.
When you start slope staking and you measure your first shot, the program computes an intersection between a horizontal plane containing the measurement and the slope defined in the stake settings from the hinge point. FieldGenius will then compute a best guess location for the catch point and will tell you how much you need to move. After you measure a second shot, FieldGenius will create an imaginary line between the two shots and intersects the slope from the hinge point. It then computes a new solution for the catch point.
|
|
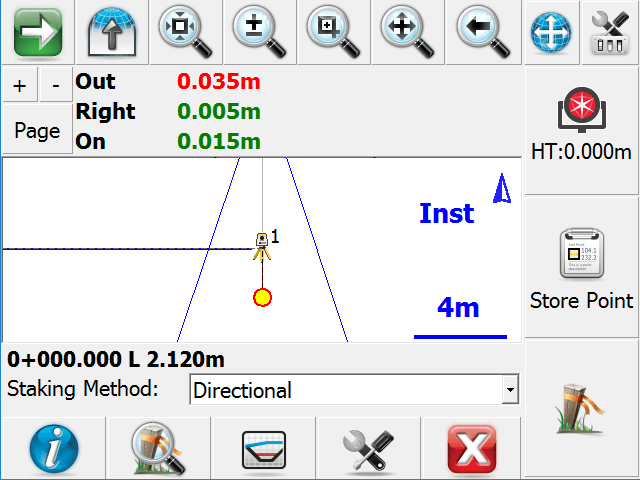
At any time during your staking you can press the Profile button to see the actual rod position which will be shows as an orange circle. You will also see the slope lines from the hinge point. |
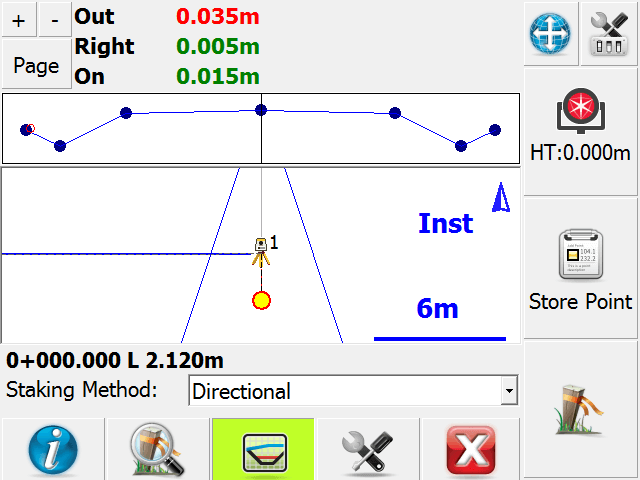
When you get near the catch point if you press the Zoom Stake button you will see a green circle in the map view representing the area within your specified staking tolerances.

Slope Staking Results
When you store your catch point position you will see the results screen. This screen will always report the following:
Cut or Fill Slope: The first line will always tell you if you staked a cut slope or fill slope. It will also display the design slope that was specified and record the actual computed slope that was staked.
Station: This will display the station of the template or cross section, and will show the actual station staked at the catch point.
Hinge Point: This is the distance from the rod position to the hinge point. It will also indicate the vertical distance from rod position to the hinge point. A cut indicates that the hinge point is lower; fill indicates that it is higher than the current rod position.
Center Line: This is the distance from the rod position to the centerline. It will also indicate the vertical distance from rod position to the centerline. A cut indicates that the centerline is lower; fill indicates that it is higher than the current rod position.
Save Shot
Press Save Point and Raw Data store a point for this shot and to write your stake and cut sheet records to the raw file. By default the description for the stored stake point will equal the station and offset that was being slope staked. An example of an auto generated description is CP 4+00.00 R 22.000. The CP stands for Catch Point.
Press Save Raw Data to write your stake and cut sheet records to the raw file, without storing a point.
If you press Cancel, nothing is stored or written to the raw file.
Records written to raw file
Following are the records that are written to the raw file when you store a point.
If you do not store the staked point, the SP (Store Point) record will not be recorded as no point was stored in the database.
SP,PN81,N 5002.9770,E 4997.8367,EL99.9829,--CP 0+12.00 L 1.000
SL,ST12.000,OD2,EL99.983,GD99.983,AS0.005,HH0.985,VH0.966,HC1.985,VC0.966,CF0,DS1.000000,OB1.019583
SK,OP100,FP81,AR282.28000,ZE90.16000,SD3.6800,--CP 0+12.00 L 1.000
Slope Staking with Offset/Setback
In the Stake Alignment screen if you specify a stake offset or a setback distance, after you store your catch point position you will be asked if you want "Continue with staking the catch point setback?" If you press No, then this will be cancelled.
When you press Yes, you will then see the "Turn To" screen which will stake a position that is offset from the computed catch point. This offset will be equal to the offset you specified in the alignment screen.
Now on the staking toolbar you will see the word Stk: Pnt CP Setback which indicates you're currently staking a slope stake setback point.
When you get to the offset position and store the point you will see the results screen once again. This time, the offsets to the hinge point and centerline will include the offset distance.
The vertical distances that are reported on the results screen are not computed using the current rod position. These values will be in relation to the actual catch point that was staked.

When you store the point you will see that the description that is auto generated for the point will be similar to the following example. REF CP 4+00.00 R 24.00
Records written to raw file
Following are the records that are written to the raw file when you store a point.
If you have the Store Staked Point toggle turned off in the stake settings screen, you will see that no SP record is recorded as no point was stored in the database.
SP,PN5004,N 5007.7522,E 5001.5139,EL100.1445,--CP 0+06.00 L 1.000
SL,ST6.000,OD2,EL100.144,GD100.144,AS-0.002,HH0.498,VH0.501,HC1.498,VC0.501,CF0,DS1.000000,OB0.994169
SK,OP101,FP5004,AR353.45220,ZE90.23420,SD13.9200,--CP 0+06.00 L 1.000
SP,PN82,N 5007.2194,E 5002.2307,EL102.2842,--REF CP 0+06.00 L 2.000
SR,ST6.000,OD2,EL102.284,GD100.144,AS-0.002,HH2.390,VH0.501,HC2.387,VC0.501,CF0,DS1.000000,OB0.994169,OL1.000
DE,PNCP Setback,N 5007.078,E 5002.253,EL100.144,--
SD,ND-0.141,ED0.022,LD-2.140
SK,OP101,FP82,AR351.10340,ZE82.00000,SD14.6850,--REF CP 0+06.00 L 2.000