Check Point
Main Menu or Instrument Toolbar | Measure Modes | Setup & Check | Check Point
Use this to measure a check shot to an existing point. When you start the command you will see the point chooser appear where you can create a new point or pick an existing one from a list or from the screen. After you choose your point you will be ready to measure. You will note the Measure Mode will be set to Check Pnt and if you need to cancel the operation you can do it by pressing the Measure Mode button and choose to cancel it.
Check Point Summary
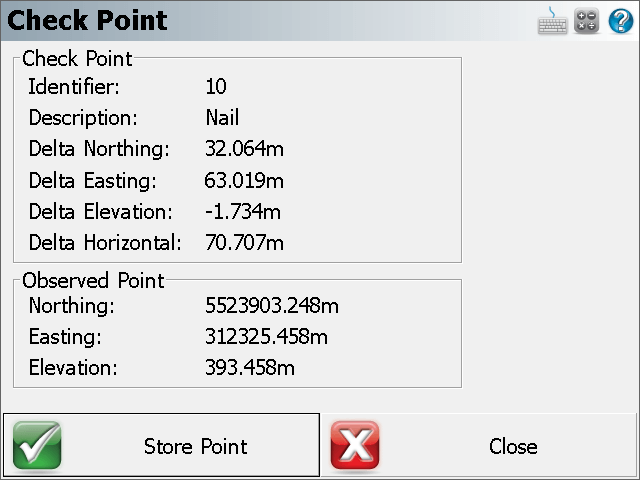
When you're ready to record the shot press the Measure button on the instrument toolbar. You will be presented with a screen that compares your measured values to the ones that were computed for the check shot point.

The deltas that are displayed are computed by subtracting the shot coordinates from the known coordinates. In other works if you add the deltas to the shot point coordinates you will end up at the known point.
Store Point
Pressing this will exit the function and write several notes to the raw file summarizing your check shot, and allow you to store the shot using the Store/Edit Point screen.
--Check Point
-- Check Point ID: 110
-- Check Point dNorthing: -4.59'
-- Check Point dEasting: -1.82'
-- Check Point dElevation: -4.96'
-- Check Point dHorizontal: 4.94'
-- Observed Values: HA 45°00'00.0" VA 90°00'00.0" SD 23.00' HR 5.00'
-- Observed Point Northing: 5016.26'
-- Observed Point Easting: 5016.26'
-- Observed Point Elevation: 95.00'
Close
This will exit the check shot function and not write anything to the raw file or storing a new point.