Leica Infinity
Infinity Release 5.0.0 includes a direct export option of Conventional and GNSS data that is confirmed to be compatible with STAR*NET.
See this article for a tutorial and detailed instructions
If using an Infinity release between 4.3.1 and 5.0.0, then you can export Conventional and GNSS data to a STAR*NET format using the steps below.
This export solution offers capabilities that differ from the STAR*LeicaDBX converter and provides an alternate workflow:
- Station IDs, Target heights etc can be edited in Infinity before export
- Direction sets created from sets of angles will be merged into a single direction set for each occupation to better model the network and to reduce how often incomplete sets of angles can affect your results.
- Sets of angles "Training shots" will be included as input and grouped so they can be disabled if required.
- Tilt corrected RTK GNSS can be exported directly to STAR*NET
- Post Processed GNSS can be exported
The STAR*NET Export Option is currently available as a Localization download. Follow these steps to start using this feature:
Run Infinity
- Select "Help & Support" from the left panel
- Select the "Localise your Infinity" button
- Search for or browse to USA
- Select 4.3.1 (or the newest version)
- Check on Documents
- Click the Documents icon as shown
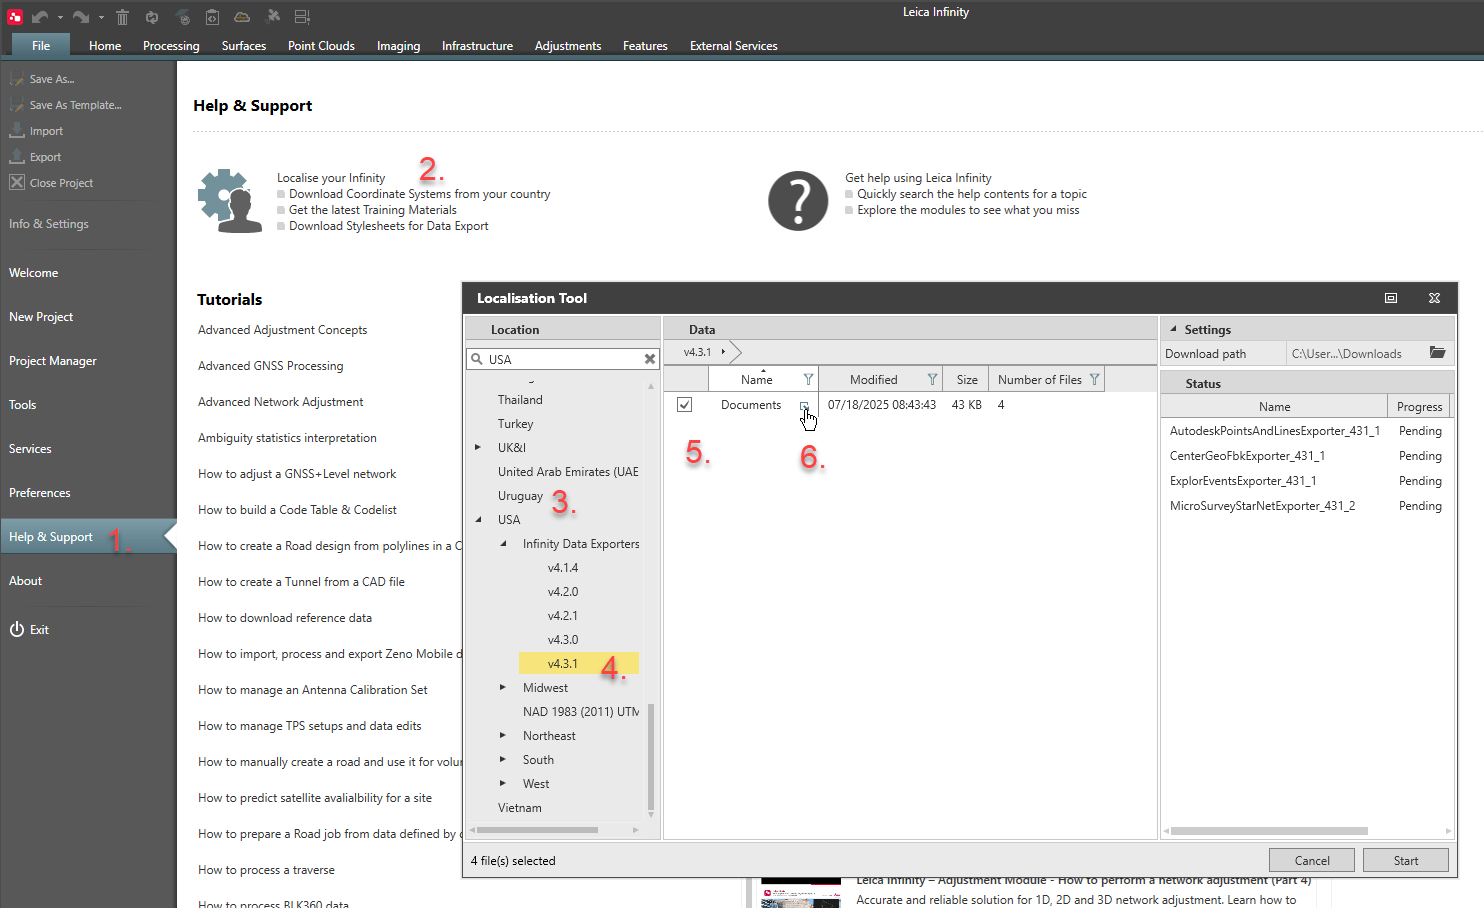
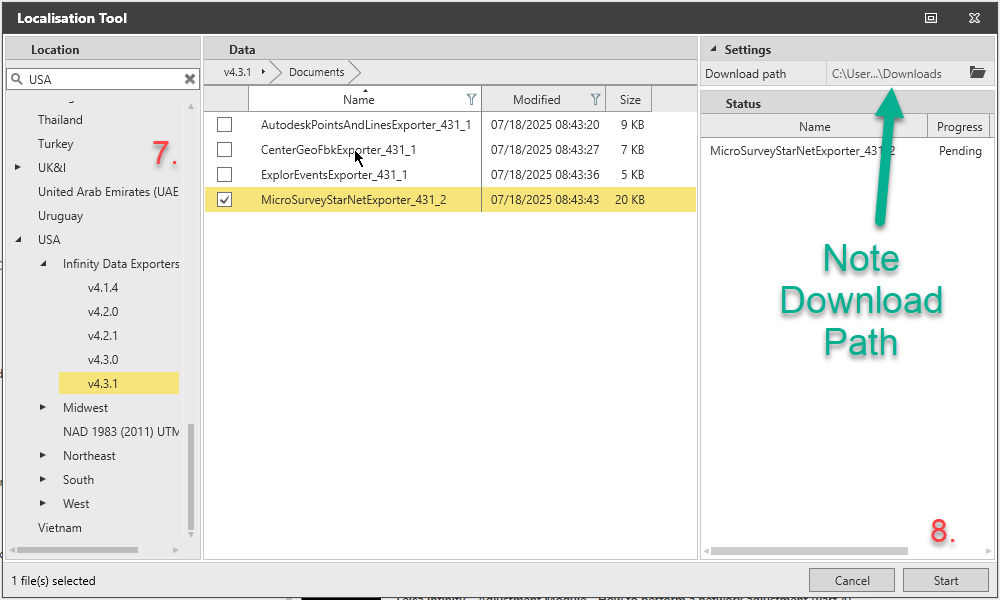
7. Uncheck all items except MicroSurveyStarNetExporter_XXX_X
8. Start
Take note of the Download Path
Close Infinity
NOTE: You must be logged into an Administrative account to take the next steps:
- Find the zip file "MicroSurveyStarNetExporter_431_2.zip" in the folder noted in step 9 above
- Unzip the file
- This will create the file "Leica.Sprout.Data.MicroSurveyStarNet.dll"
- Copy this file into: C:\Program Files\Leica Geosystems\Infinity\modules and give administrative permissions when prompted
Using the new Export Option:
- Launch Infinity
- Open the project with data you'd like to export to STAR*NET
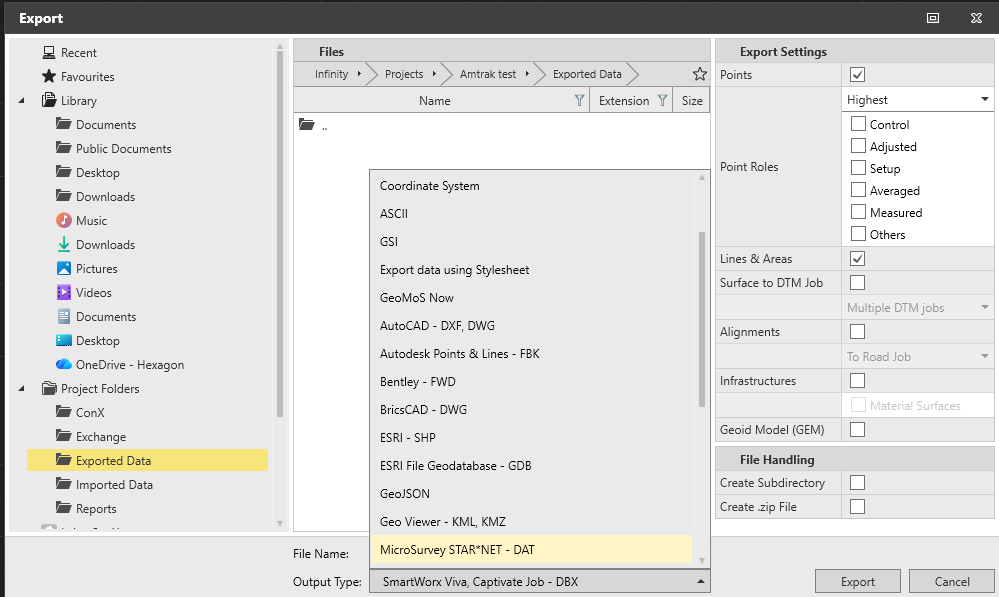
- Export
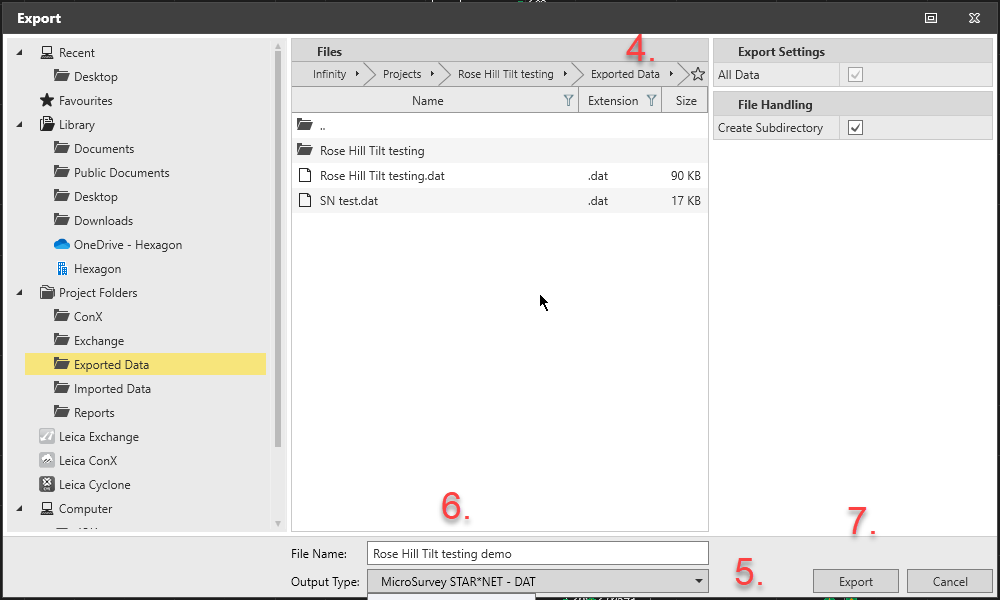
- Set your export folder and options
- Select Output type "MicroSurvey STAR*NET DAT"
- Enter a File Name
- Export
- Use Windows File Explorer to open the folder set in step 4 and copy your dat file to the location of your STAR*NET project
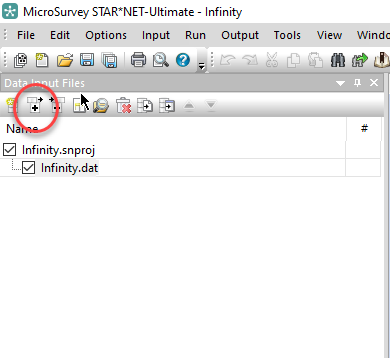
The dat file can now be added to a STAR*NET Project using the "+" icon in the input panel: