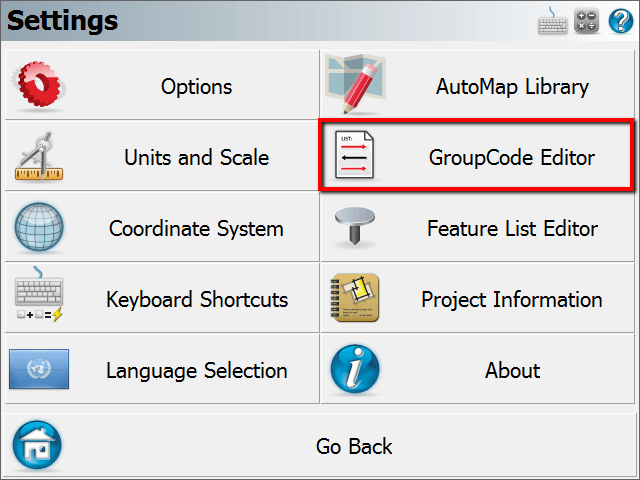
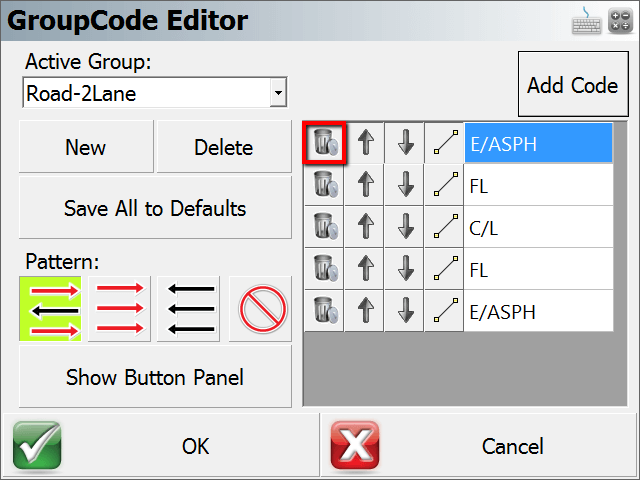
GroupCode Editor
Pre-defined groups are included with the default installation consisting of codes from the default AutoMap library. Default Groups are stored in the Settings.xml file, and those default groups will automatically be included when a new Project is created. There are two ways to create and edit Groups.
Main Menu | Settings | GroupCode Editor
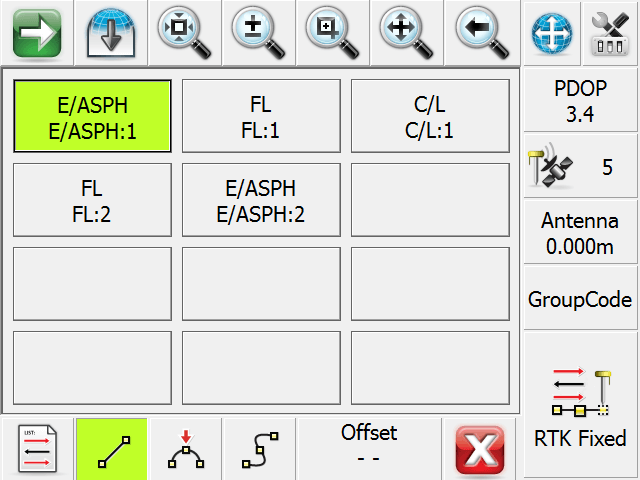
From within the GroupCode Measure Mode:

The editor shows the active group and the codes defined within the group. Toggles and options are also set from within the editor:
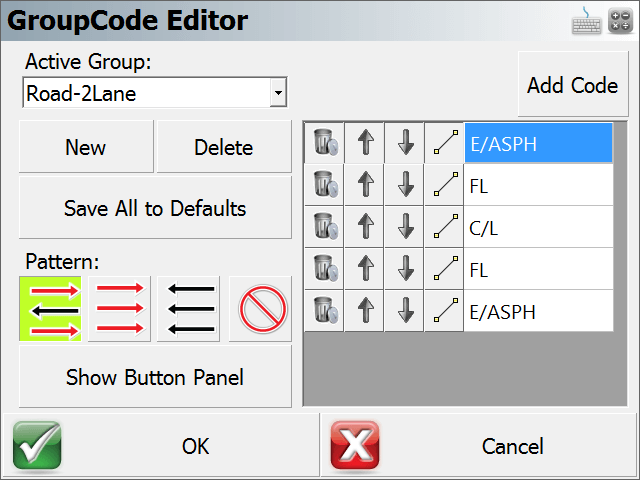
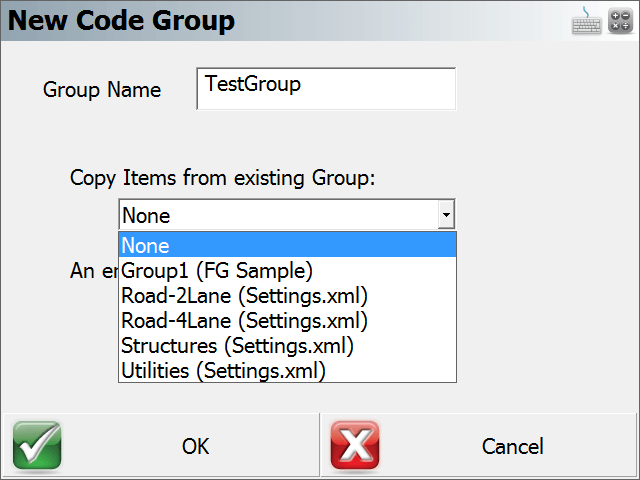
Creating a New Group
Pick “New” to create a new group. A dialog opens to enter a name for the group.
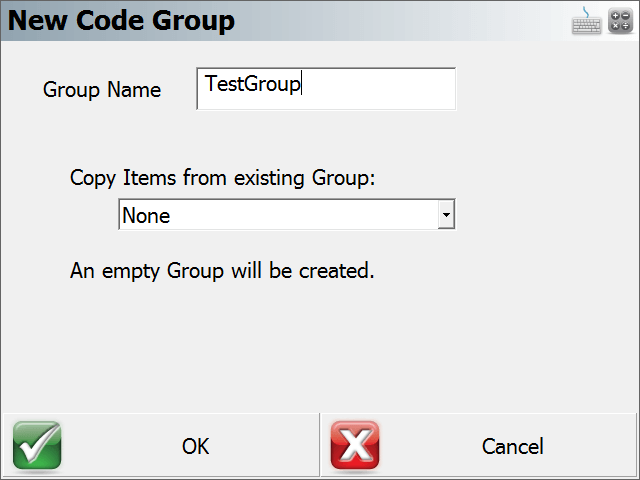
Optionally copy the group items from another group in the current Project, or from the defaults stored in the Settings.xml file.
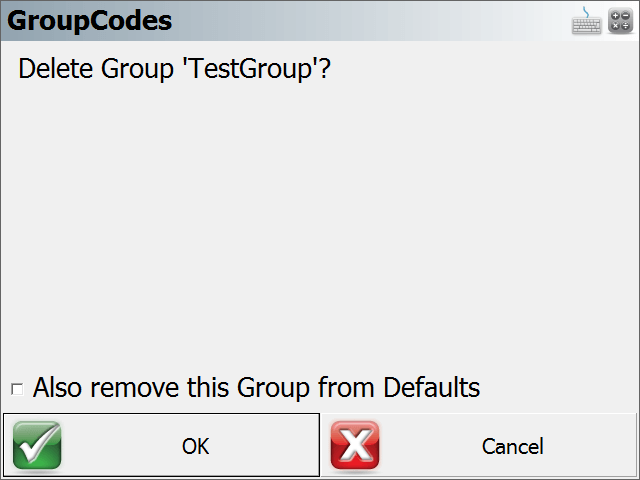
Deleting a Group
Pick “Delete” to delete the active group. A confirmation dialog is displayed.
Saving a Group to Defaults
Pick “Save All to Defaults” to copy all groups from the current Project to the Settings.xml file.
Setting an Automation Pattern
Pick the icon of the Automation Pattern to set for the group. The pattern controls the automatic setting of the next active code after a measurement has been stored. The options are “Zig-Zag”, “Left to Right”, “Right to Left” and “None”.
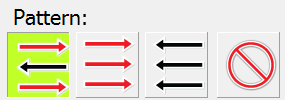
- Zig-Zag pattern will cycle through the group, then reverse back through, and repeat
- Left to Right pattern will cycle through the group in a forward direction
- Right to Left pattern will cycle through the group in a reversed direction
- None pattern does not auto-select the next code, it is up to the user to pick the code
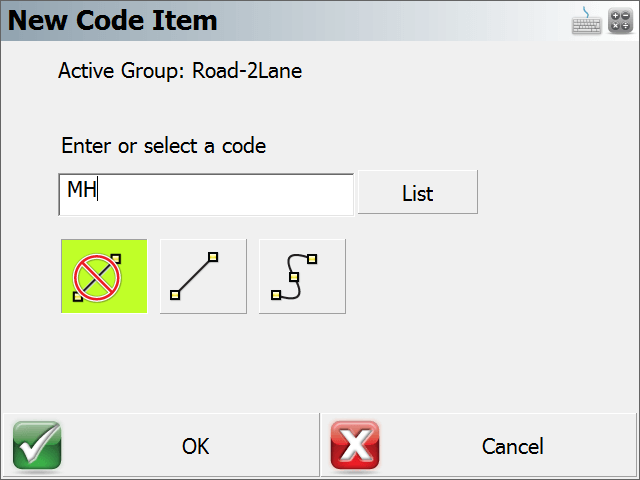
Adding Codes to a Group
Pick “Add Code” to enter a new code to the group. A dialog opens to enter the code (or pick from the AutoMap list) and to set the linework toggle for the code.
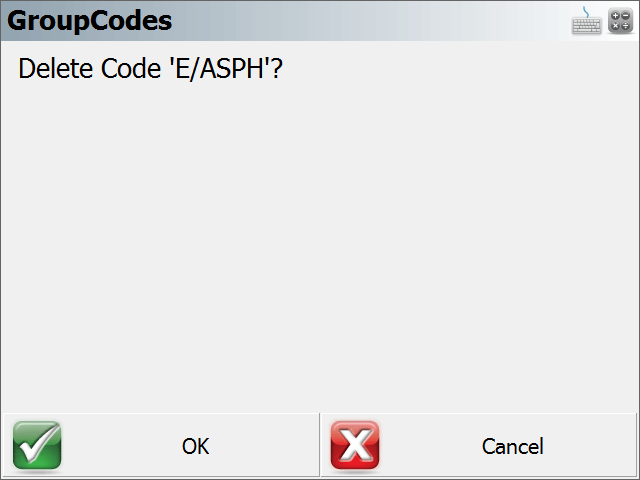
Deleting a Code from a Group
Pick the Delete icon of the code row to remove a code from the list.
A confirmation dialog appears.
Modify Code Order
Use the Up and Down arrows to move the Code up or down within the group.
Toggle Linework
Use the Line Toggle to switch the current linework toggle for the code. The options of “straight line”, “second point on 3-point arc”, “spline”, and “none” are cycled.
Toggle Display
The “Show Button Panel” option can set the display mode to a grid of 12 buttons with the codes of the group. The default display mode is the code carousel with the Map Screen visible.