Point Scanning
Main Menu or Instrument Toolbar | Measure Modes | Point Scanning
FieldGenius supports point scanning which allows you to create a point cloud of data. To use this routine you need a reflectorless instrument that has servo motors.
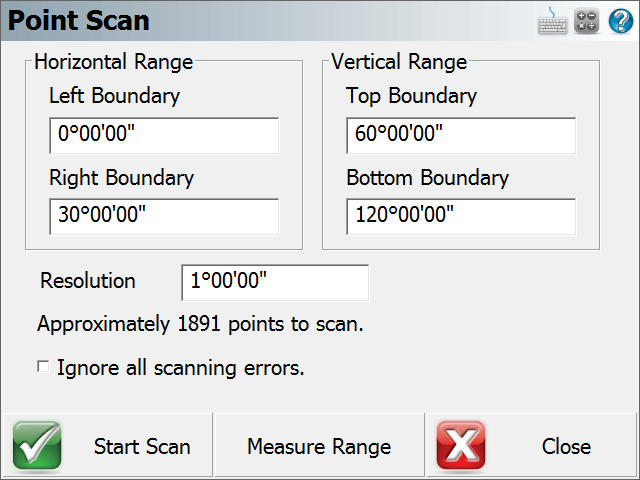
To start, you will be asked to define a scan area by pressing the Measure Range button and pointing the instrument at the Bottom-Left and Top-Right corners of the area you want to confine the scanning to.
Once the scan area is defined, you can define the scan resolution by using an angular value. For example if you set it to 0°30'00", FieldGenius will create a pattern confined to the limits you defined, and scan at 30 minute intervals both horizontally and vertically. Once you've defined the scan area and resolution, FieldGenius will display an estimate of how many points will be stored.
You also can control how FieldGenius deals with measurement errors while scanning. If you turn on "Ignore all scanning errors", FieldGenius will ignore measurement errors and continue without interruption. If you don't turn this on, FieldGenius will stop and display a message allowing you to stop the scanning process, or continue on with the next measurement.
Press the Start Scan button to select the desired reflectorless EDM Mode and initiate scanning. FieldGenius will display an estimate of the time remaining for the scan to complete.
Points will be stored using the description defined in the map screen. The point number of the first point will be set to the "next available" id and will increment sequentially. The shots are stored in the raw file as sideshots so you have a record of the observations.
Upon completion, you will receive a summary showing the total number of successful measurements and errors received.