Map Data Layers
Main Menu | Data Manager | Map Data Layers
Use this to load, unload, and control the visibility of DXF files,
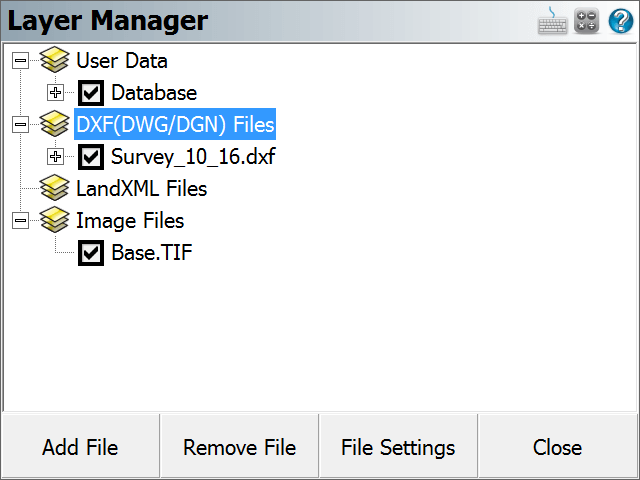
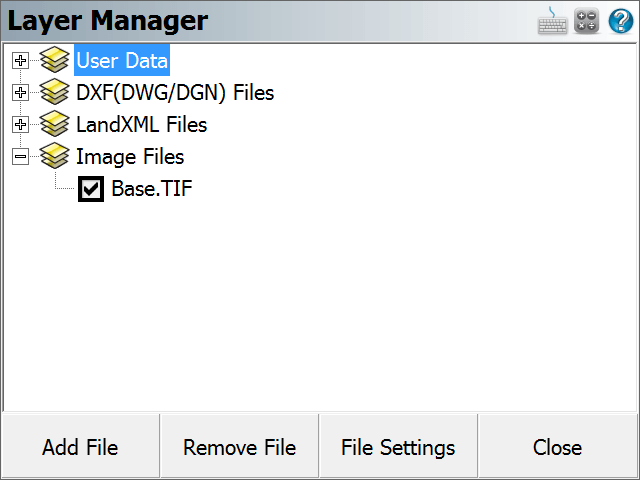
User Data
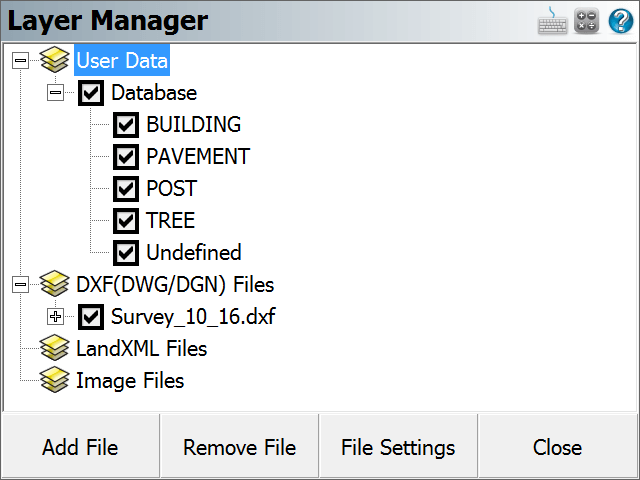
FieldGenius uses the layer names specified in the AutoMap library to control the visibility of points and figures by their description.
You can control the visibility of the entire database (both points and figures) by checking or unchecking the Database option under the User Data section of the tree. If the box is checked, then the database is turned on and all of its layers will be visible; if unchecked, then the file and all of its layers is turned off and it will not be visible. If the box has another smaller square inside it, this means that some of its layers are turned on and other layers are turned off.
You can control the visibility of individual layers by expanding Database option under the User Data section of the tree, and checking or unchecking the box beside the name of the layer. If the box is checked, then the layer is turned on and entities on that layer will be visible; if unchecked, then the layer is turned off and entities on it will not be visible.
When you close the Project, the layer status will be saved so that the next time the Project is opened, the layer visibility will automatically be set the same as you had left it, so layers that were turned off will remain turned off the next time the Project is opened up.
DXF Files
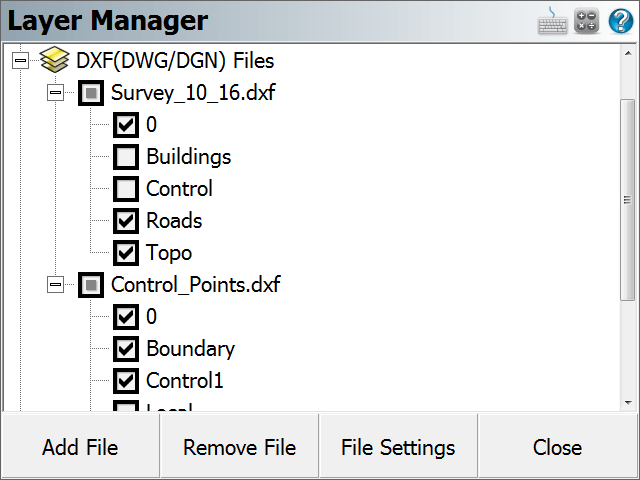
You can load multiple DXF files into your FieldGenius Project, and control the visibility of each of their layers independently from the others.
You can control the visibility of the entire DXF file by checking or unchecking the box beside the name of the DXF file, under the DXF Files section of the tree. If the box is checked, then the file is turned on and all of its layers will be visible; if unchecked, then the file and all of its layers is turned off and it will not be visible. If the box has another smaller square inside it, this means that some of its layers are turned on and other layers are turned off.
You can control the visibility of individual layers by expanding the name of the DXF file under the DXF Files section of the tree, and checking or unchecking the box beside the name of the layer. If the box is checked, then the layer is turned on and entities on that layer will be visible; if unchecked, then the layer is turned off and entities on it will not be visible.
When you close the Project, the layer status will be saved so that the next time the Project is opened, the layer visibility will automatically be set the same as you had left it, so files that were turned off will remain turned off the next time the Project is opened up.
Add File
Press the Add File button to select a DXF file that you want to load into your Project. You will be able to browse to and select any DXF file. Please see the Import DXF File topic for more information.
Remove File
Highlight the DXF file that you want to remove from your Project, then press the Remove File button. If a file is not highlighted, you will be reminded that a file must first be selected from the tree. This will turn off all layers from the selected file in your FieldGenius Project and disassociate the DXF file. It does not delete the DXF file.
File Settings
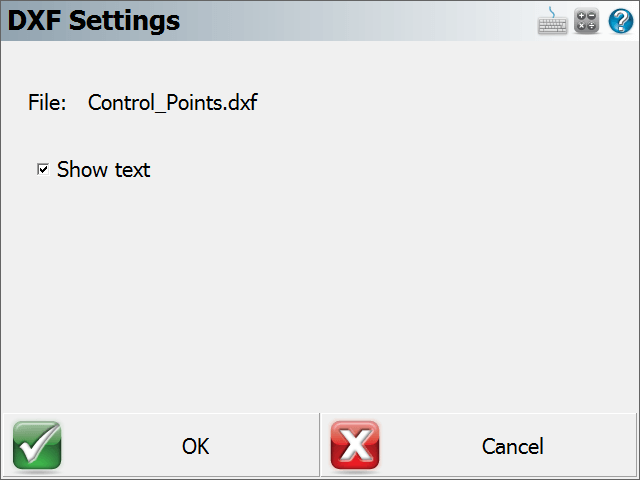
Highlight the DXF file that you wish to change the settings for, then press the File Settings button. You can enable or disable the display of text in the selected file. If your DXF file contains text, turning this off will improve performance of FieldGenius. Pressing the OK or Cancel buttons will return you to the Layer Manager screen.
LandXML Files
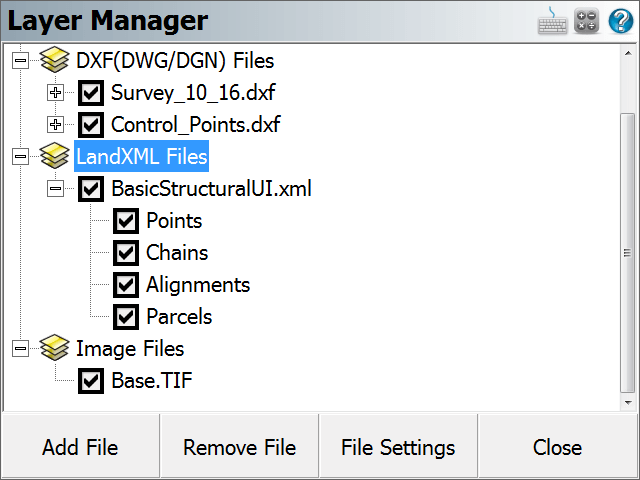
You can load one LandXML file into your FieldGenius Project at a time, and control the visibility of its layers (points, chains, alignments, and parcels).
You can control the visibility of the entire XML file by checking or unchecking the name of the XML file, under the LXML Files section of the tree. If the box is checked, then the file is turned on and all of its contents will be visible; if unchecked, then the file and all of its layers is turned off and it will not be visible. If the box has another smaller square inside it, this means that some of its layers are turned on and other layers are turned off.
You can control the visibility of individual layers by expanding the name of the XML file under the LXML Files section of the tree, and checking or unchecking the box beside the name of the layer. If the box is checked, then the layer is turned on and entities on that layer will be visible; if unchecked, then the layer is turned off and entities on it will not be visible.
When you close the Project, the layer status will be saved so that the next time the Project is opened, the layer visibility will automatically be set the same as you had left it, so layers that were turned off will remain turned off the next time the Project is opened up.
Add File
Press the Add File button to select a LandXML file that you want to load into your Project. You will be able to browse to and select any XML file. Please see the Import LandXML File topic for more information. Note, you must first unload the currently loaded XML file before loading a different one.
Remove File
Highlight the XML file that you want to remove from your Project, then press the Remove File button. If a file is not highlighted, you will be reminded that a file must first be selected from the tree. This will turn off all components of the selected file in your FieldGenius Project and disassociate the XML file. It does not delete the XML file.
File Settings
The File Settings button does not apply to LandXML files.
Image Files
You can load georeferenced JPG or TIFF images into your FieldGenius Project, and control the visibility of the image.
You can control the visibility of your image by checking or unchecking the box beside the name of the image file, under the Image Files section of the tree. If the box is checked, then the image is turned on and it will be visible; if unchecked, then the image is turned off and it will not be visible.
When you close the Project, the visibility and opacity status of the image file will be saved so that the next time the Project is opened, the image visibility will automatically be set the same as you had left it.
Add File
Press the Add File button to select an image file to load into your Project. You will be able to browse to and select any JPG or TIF file. JPG files must have a corresponding JGW world file, and TIF files must have a corresponding TFW world file; these world files contain the georeferenced positioning information. The world file must have the same file name as the image file (just with the appropriate extension), and it will be automatically used to position the image. Note that the world file is unit-less, make sure that the unit settings in the desktop and mobile software are the same.
Remove File
Highlight the image file you want to remove from your Project, then press the Remove File button. If a file is not highlighted, you will be reminded that a file must first be selected from the tree. This will turn off the selected image in your FieldGenius Project and disassociate the image file.
File Settings
Highlight the image file you want to view or change the display settings for, then press the File Settings button. You will see the file's name, size, and position information. You can also adjust the opacity of the image. The default value of 100 will cause the image to be displayed normally, and reducing this value will make it appear fainter on the screen. This is useful if the image file being displayed makes your other FieldGenius data too hard to see over top of the image. Pressing the Close button will return you to the Layer Manager screen.
